A transparent LED screen site survey can start with a simple rendering and become complicated the moment the project reaches a real glass facade. Buyers often start with the overall window size, but a usable quotation also depends on mullions, clear openings, viewing direction, daylight, mounting points, service access, power, signal routing, and the part of the glass that must stay visually open. If those details are missing, two suppliers may be pricing completely different installation assumptions.
A practical transparent LED screen site survey gives your supplier enough information to recommend the right format without guessing. It also helps your local architect, installer, electrician, and visual-merchandising team review the same plan before the order moves forward.
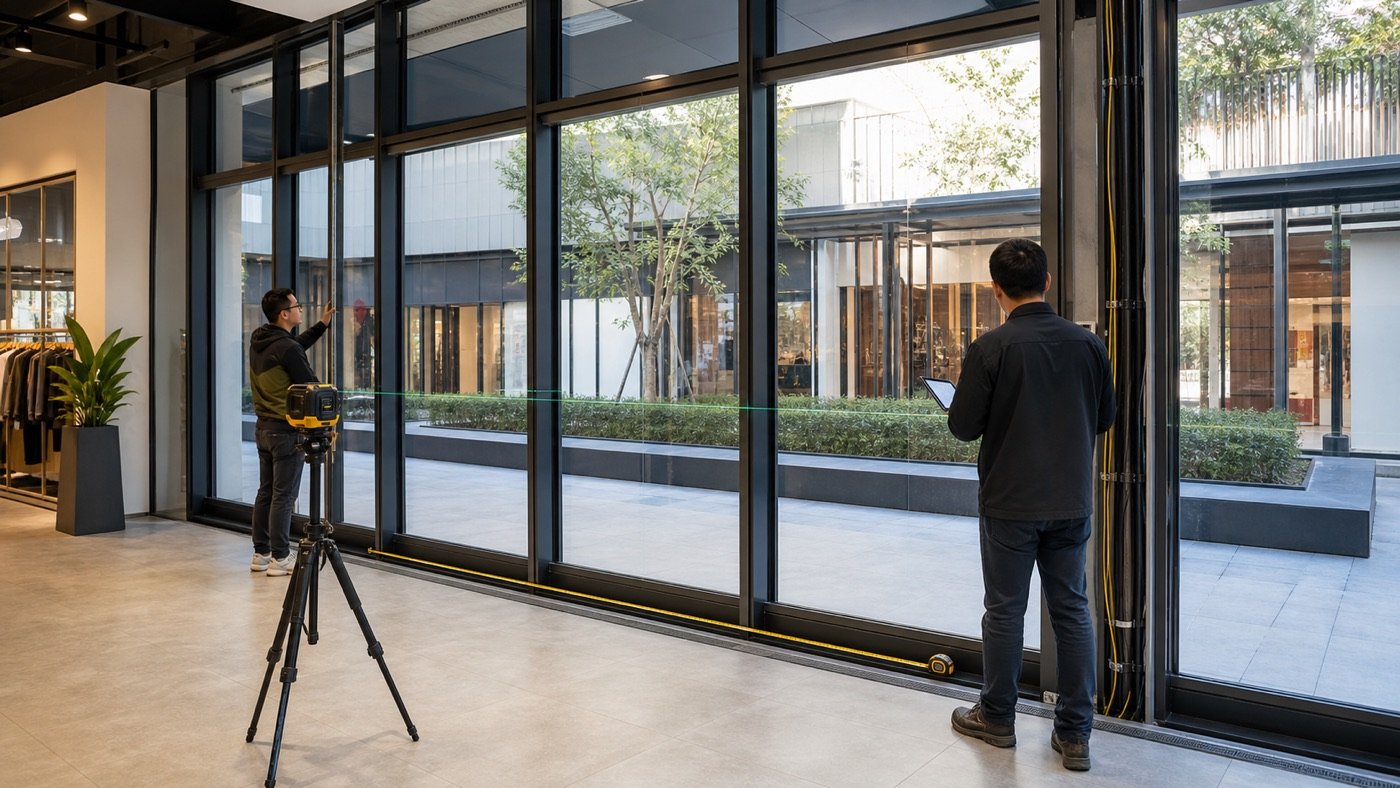
Treat the Glass Facade as Part of the Display System
The screen does not exist separately from the glass. The facade determines where the display can sit, how it can be supported, which sightlines remain open, and whether technicians can reach it later. Start with an elevation drawing if one is available. If not, create a simple front-view sketch that shows every mullion, door, corner, vent, sprinkler, sign, sensor, and restricted zone.
Measure the clear opening between mullions rather than relying only on the total facade width. A five-meter storefront may contain several smaller usable sections. Note whether the glass panels are flat, angled, curved, or split by doors. The supplier can then compare the site with the available film or cabinet formats on the Transparent LED Display product page.
Transparent LED Screen Site Survey Measurement Table
| Survey field | What to record | Why it changes the quotation |
|---|---|---|
| Clear glass openings | Width and height of each usable section | Defines the real display area and module or cabinet layout |
| Mullions and frames | Spacing, face width, depth, and material | Affects alignment, mounting zones, and visible interruptions |
| Mounting surface | Available brackets, floor, ceiling, wall, or structural points | Determines whether the proposed format can be supported |
| Service access | Front, rear, side, ceiling, or removable access route | Changes maintenance planning and equipment clearance |
| Viewing direction | Inside-to-outside, outside-to-inside, or both | Helps define content orientation and the priority viewing side |
| Closest viewing distance | Nearest normal viewer position | Supports a practical pixel-pitch discussion |
| Daylight conditions | Glass orientation, direct sun periods, interior lighting, and reflections | Guides the brightness and transparency tradeoff |
| Power and signal route | Panel location, cable distance, entry point, and concealment path | Prevents late changes to wiring and control placement |
Use millimeters for detailed facade measurements and mark which values are verified versus estimated. Put a reference object or tape measure in site photos when scale is not obvious. A marked-up drawing is more useful than a folder of unlabeled images.
Confirm Installation Side in the Transparent LED Screen Site Survey
An indoor screen installed behind glass faces different conditions from a system mounted on an exterior facade. Record whether the display will be inside or outside, how far it will sit from the glass, and which direction the content must face. For an interior storefront installation, check reflections, window treatments, cleaning access, doors, and the space between the display and merchandise. For an exterior installation, the local project team must review weather exposure, structural design, sealing, safe access, and local approval requirements.
The current transparent LED screen for glass facades guide explains the basic choice between film and cabinet-type solutions. Your survey should document the site first; the product format should follow from those conditions rather than from a catalog photo alone.
Set Priorities for Transparency, Daylight Visibility, and Detail
“Maximum transparency” is not a complete project brief. Buyers need to explain what must remain visible through the glass, when the display will run, and where viewers will stand. A retail window that must preserve a clear view of merchandise may prioritize openness. A facade intended for daytime campaigns may put more weight on visibility in strong ambient light. A close-viewing atrium may prioritize image detail.
Ask each supplier to state the quoted product series, pixel pitch, brightness basis, transparency or permeability basis, and the cabinet or film layout used in the drawing. Do not compare one supplier’s best-case transparency figure with another supplier’s configured project value. Keep the definitions and test conditions beside the numbers.
Use the Transparent LED Screen Site Survey to Plan Mounting and Service Access
Mark the proposed support points on the survey drawing, but have the local structural professional or responsible installer approve the final attachment design. The LED supplier can provide product dimensions and layout information; the local project team understands the building, glass system, loads, codes, and permitted work methods.
Then walk through a future service visit. Can a technician reach the display without removing merchandise or blocking a public entrance? Can modules, power units, and control components be accessed using the quoted maintenance method? Is there a safe place for a ladder or lift? The broader LED display installation site checklist can help the local team review structural, unloading, control, and maintenance questions beyond the glass itself.
Map Power, Signal, Control, and Heat Paths
A transparent LED screen site survey should document the proposed electrical panel, control-equipment location, and cable entry points. Measure the approximate route instead of drawing a straight line through walls, ceilings, or doors. Note where cables must remain hidden and who is responsible for the local electrical work.
Transparent does not mean invisible from a building-services perspective. Power supplies, control hardware, wiring, and heat still need a planned location. Ask for a layout that shows where those items sit and how they can be reached. The local electrician should confirm voltage, capacity, protection, grounding, routing, and compliance for the actual site.
Send Photos That Answer Questions, Not Just Look Attractive
Take one straight-on photo of the complete facade, then add left, right, interior, exterior, upper, lower, and cable-route views. Photograph obstructions and access limits. File names such as “interior-right-service-access” are far more useful than a phone’s automatic numbering. If the project team has a CAD elevation, add a PDF export with dimensions so every reviewer can open it.
Use the examples on the Project Cases page to clarify the intended application category, not as proof that two sites are structurally identical. Every glass facade still needs its own measurements and local review.
RFQ Fields for a Transparent LED Screen Project
- Project city and delivery country
- Indoor or outdoor installation
- Total facade size and each clear glass opening
- Mullion spacing, width, depth, and annotated photos
- Flat, angled, or curved glass sections
- Inside or outside mounting position
- Primary viewing direction and closest viewing distance
- Daylight direction, direct-sun periods, and operating hours
- Priority order: transparency, brightness, image detail, weight, or service access
- Available mounting zones and locally approved support concept
- Front, rear, side, or removable service route
- Power panel and control-equipment locations
- Preferred content source and cable route
- Target installation date and site-access restrictions
- Drawings, photos, and the name of the local installation contact
If the product family is not yet decided, compare transparent options with the other categories in the LED Display Product Catalog. That prevents a transparent solution from being selected only because the building contains glass.
Warning Signs in a Transparent Screen Quotation
- The quote uses only the total facade size and ignores mullions or clear openings.
- The product series is missing from the layout or specification sheet.
- Transparency and brightness appear as isolated headline numbers with no configuration basis.
- The drawing has no mounting, power, signal, or service-access notes.
- The supplier assumes an attachment method without asking about the facade structure.
- The cabinet map, image size, and quoted quantities do not match.
- The proposal does not separate supplier scope from local structural and electrical responsibilities.
These gaps do not automatically make a proposal unusable, but they are reasons to pause and request a coordinated revision before paying a deposit.
Turn the Survey Into a Comparable Supplier Brief
Give every shortlisted supplier the same drawing, photo set, measurements, operating priorities, and RFQ fields. Ask them to return a marked cabinet or film layout, the proposed product series, service method, mounting assumptions, power and control outline, packing basis, and a list of items that remain the buyer’s or local contractor’s responsibility.
When your transparent LED screen site survey is ready, send the dimensions, photos, viewing distance, daylight conditions, mounting position, and delivery country. Mirun Hailian can use that information to recommend a catalog-based configuration for comparison with your project requirements.
Need help choosing the right LED display?
Tell us your installation scene, screen size, pixel pitch target and timeline. Mirun Hailian can help match the right product configuration.