A curved screen can look simple in a render while requiring the wrong cabinet quantity, rigging geometry, content map, or special spares on site. For a B2B buyer, the practical question is not simply whether a supplier offers it. The question is how to define, compare, test, and approve curved rental LED display without leaving expensive assumptions for installation or handover.
A buildable curve begins with the exact cabinet angle, radius, structure, canvas, and crew workflow. This guide is written for rental companies, event producers, scenic designers, and touring crews who need a usable RFQ and approval process, not another page of disconnected marketing specifications.
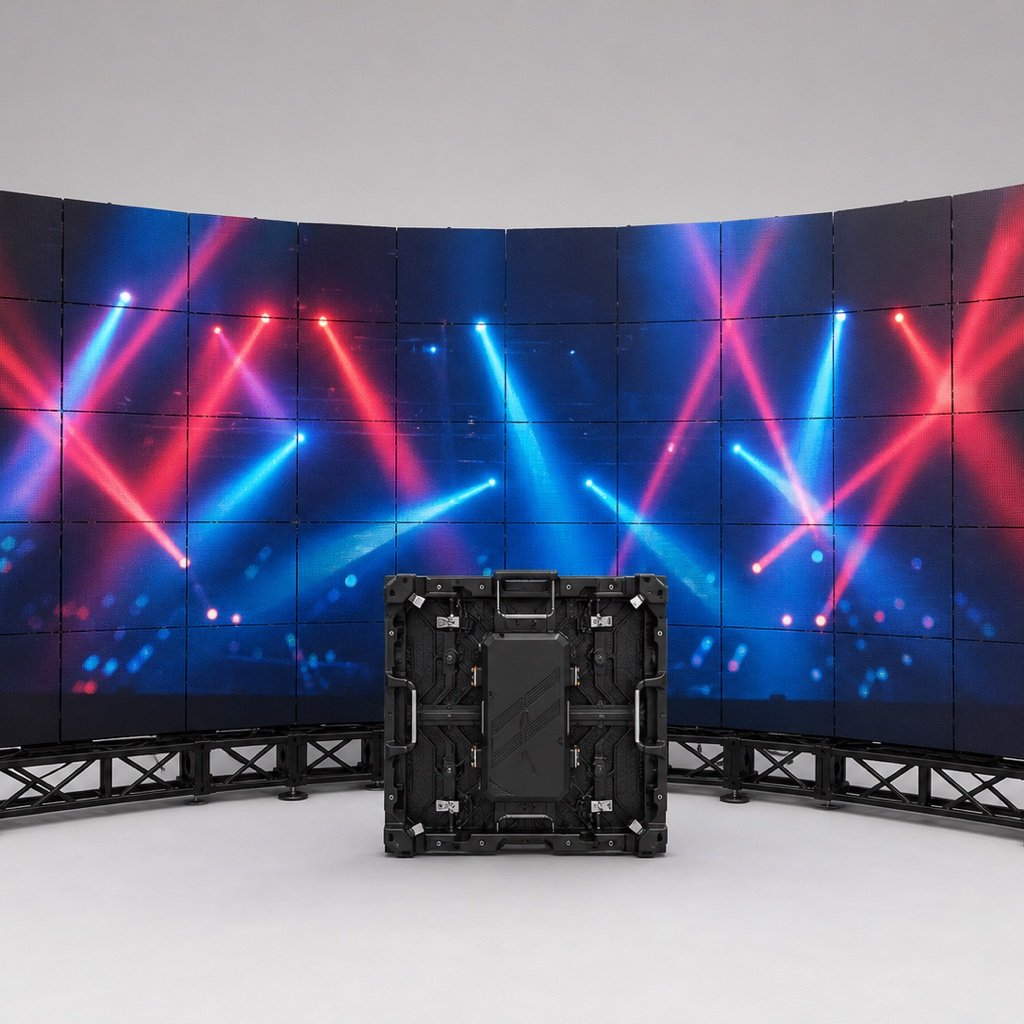
Turn the Scenic Curve Into Cabinet Positions
Provide the desired arc, chord width, height, viewing side, floor or flown support, and allowable depth. Ask the supplier to return a cabinet-by-cabinet layout with angles and total active resolution. The same LED hardware can perform very differently when the audience, content, ambient light, and operating hours change. Start with the business use case, then work backward to the screen configuration.
Verify Angle Steps and Achievable Radius
Confirm the positive and negative angle settings, lock tolerance, cabinet width, corner behavior, and whether the curve is faceted or mechanically smooth. Build a representative section.
A small angle change across many columns can move the end position significantly. The approved scenic geometry must match the physical cabinet settings. Ask the supplier to state the assumption in writing and show how the proposed product or workflow addresses it.
Coordinate Rigging and Load Distribution
Show hanging bars, ground supports, ballast, truss points, bracing, and connection order. Obtain project-specific approval from the responsible rigging or structural professional.
Curved arrays can introduce forces and alignment issues that a flat-wall rig does not reveal. The complete load path matters. Ask the supplier to state the assumption in writing and show how the proposed product or workflow addresses it.
Create the Pixel Map Before Content Delivery
Document the active pixel canvas, cabinet order, controller ports, seam positions, safe title area, and any content distortion or perspective treatment. Test grid and motion files.
A content team cannot reliably prepare media from a stage rendering alone. A controlled pixel map reduces last-minute processor changes. Ask the supplier to state the assumption in writing and show how the proposed product or workflow addresses it.
Pack Special Parts and Train the Crew
Identify angle locks, curved hanging hardware, corner or half cabinets, data jumpers, and alignment tools. Label cases by screen zone and rehearse the sequence.
A curved build becomes slow when special parts are mixed with standard inventory. A short prebuild exposes missing hardware before load-in. Ask the supplier to state the assumption in writing and show how the proposed product or workflow addresses it.
Curved Screen Approval Table
Use the following table to keep the curved rental LED display discussion specific. Replace generic answers with project values, named documents, and an owner for each open item.
| Buyer check | Why it matters | Evidence to request |
|---|---|---|
| Cabinet angle map | Defines the physical arc | Column-by-column layout |
| Rigging geometry | Controls alignment and loads | Approved rigging drawing |
| Pixel canvas | Guides content production | Processor map and test file |
| Special hardware | Prevents setup delays | Packing and spare list |
| Prebuild result | Confirms real assembly | Photos and issue log |
A Practical Approval Sequence
Here is the straightforward way to use this information. Add the requirement to the RFQ, send the same supporting drawings and operating details to every bidder, and ask each supplier to answer against the same checklist. If a value is unknown, mark it as an open item instead of letting someone make a silent assumption. That makes the commercial comparison much cleaner and gives engineering a useful exception list.
During Quote Review
Walk through the supplier’s response with purchasing, the technical owner, the installer, and the team that will operate the display. Ask for model-specific evidence rather than a general brochure. When two suppliers propose different approaches, compare the effect on installation labor, access, power, content, spares, training, and downtime. A lower equipment price can disappear quickly if another trade must solve an omitted interface.
Before Production or Shipment
Freeze the accepted answer in the purchase specification, drawing register, and inspection plan. Use a sample, mockup, factory test, or document review that matches the risk of the item. Record settings, test conditions, photos, measurements, file names, and approved exceptions. If the product or method changes, reopen the affected approval instead of assuming the original result still applies.
At Installation and Handover
Repeat the checks that depend on the finished site and the operating team. Confirm labels, access, configuration backups, spare parts, safety steps, and the person who owns each routine task. Then close the requirement with an as-built record that a technician can understand months later. This last step is easy to skip, but it is what turns a successful installation day into a supportable system.
Curved Rental RFQ Checklist
- Arc, chord, height, and viewing direction
- Allowed cabinet angle increments
- Flown or ground-supported structure
- Active pixel map and processor plan
- Special cabinet and hardware quantities
- Case labels and setup sequence
- Representative prebuild and acceptance
A checklist works best when it is tied to a date and an approver. Decide which items are needed at quotation, sample review, pre-shipment inspection, installation, and final handover.
Warning Signs to Resolve Before Ordering
- Only a rendered curve is supplied
- The proposed radius does not match cabinet angle steps
- Rigging is treated as a flat-wall copy
- No special spare hardware is listed
One warning sign does not automatically disqualify a supplier, but it should trigger a clearer question, a sample check, or a written exception. Silence is not the same as agreement.
Connect the Requirement to the Full Project
Use one approval sheet that connects the viewing goal to pixel pitch, brightness, size, content resolution, mounting, control, and maintenance. This gives both the buyer and supplier a practical reference. Useful related resources include the installation site checklist, refresh-rate buyer guide, shipping-damage prevention guide.
Approve a Physical Curve, Not Just a Rendering
Freeze the cabinet angle map, rigging, processor canvas, and packing plan together. A prebuild is the fastest way to prove that the show design can be assembled. A well-defined curved rental LED display requirement gives suppliers the same target and gives the buyer a fair way to compare and accept the result.
For a practical recommendation, send Mirun Hailian your stage drawings, target curve, screen size, support method, content canvas, and touring workflow. The team can use those inputs to prepare a more relevant configuration and quotation.
Need help choosing the right LED display?
Tell us your installation scene, screen size, pixel pitch target and timeline. Mirun Hailian can help match the right product configuration.