An LED wall can pass a basic power-on test and still look wrong the moment real content appears. One cabinet looks warmer. A replacement module is slightly greener. Dark gray content reveals blocks that nobody noticed on a bright white screen. For a B2B buyer, those issues quickly become a client complaint, a rejected handover, or an expensive return visit.
LED display color calibration is how the project team measures and corrects those differences. The important part is not simply asking whether the screen is “calibrated.” Buyers need to know what was measured, under which operating conditions, how the correction data is stored, and what happens when a module or cabinet is replaced later.
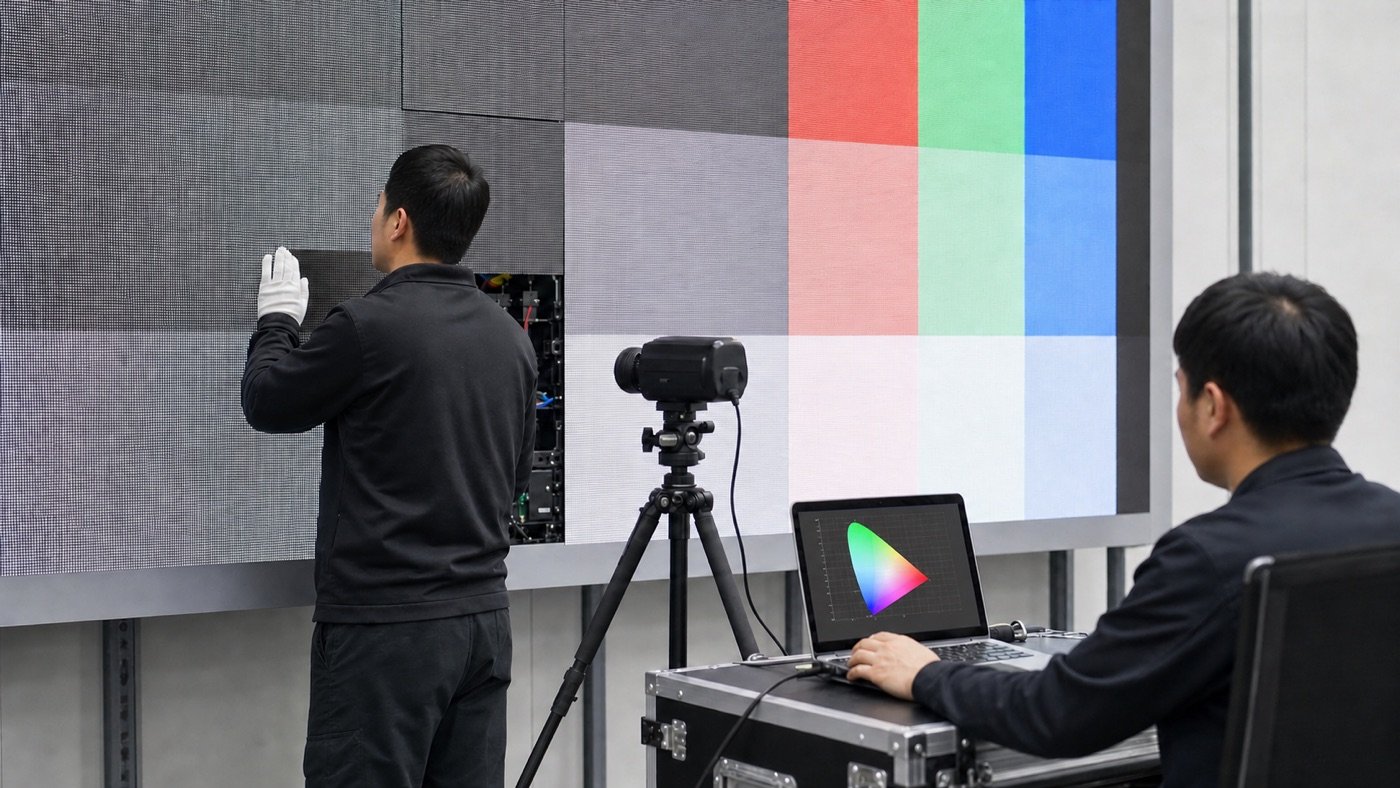
Calibration is more than making the wall look even
Visual adjustment and measured calibration are related, but they are not the same job. An experienced technician can reduce an obvious cabinet mismatch by eye. Instrument-based calibration measures brightness and color behavior, then creates correction values for pixels, modules, or panels supported by the control system.
NovaStar’s official NovaCLB calibration manual, for example, describes measuring LED brightness and color values and applying pixel-level adjustments. Brompton’s official OSCA guidance explains panel and seam adjustments for mixed batches, aging differences, and module mismatches. These are product-specific approaches, so your quotation should identify the actual receiving cards, processors, tools, and supported workflow.
Why LED displays develop visible color differences
A modular LED display combines thousands or millions of individual emitters. Small variations that look harmless on one module can become obvious when hundreds of modules form a wall. Common causes include different LED batches, component tolerances, uneven operating hours, temperature, configuration files, module replacement, and brightness settings that push the screen outside the conditions used during calibration.
- Mixed production batches: cabinets or modules may have slightly different color and brightness characteristics.
- Uneven aging: a high-use center area can behave differently from spare modules stored off-screen.
- Temperature: operating conditions can change brightness and color balance across the display.
- Replacement parts: a new module may be electrically compatible but visually different.
- Control settings: gamma, color temperature, brightness, receiving-card data, and calibration coefficients all affect the result.
This is why color planning belongs beside the brightness specification, not in a vague final note about image quality.
Define the viewing job before choosing a target
There is no single color setting that fits every project. A shopping mall screen, a corporate presentation wall, a broadcast studio, and a touring stage do not use the display in the same way. Tell suppliers where the screen will operate, what content matters, and whether cameras will be involved.
- Normal operating brightness and ambient light level
- Typical viewing distance and viewing angle
- Live camera use, frame rates, and expected shutter settings
- Critical content such as skin tones, product photography, neutral gray, or brand colors
- Indoor temperature range and expected daily operating hours
- Whether cabinets from different production batches may be mixed
Camera-facing work also needs the right LED display refresh-rate plan. Color consistency cannot compensate for scan lines, flicker, or poor low-gray behavior caused by an unsuitable control configuration.
Do not approve the wall from a white screen alone
Full white is useful for finding dead pixels and large brightness differences, but it is a weak acceptance test by itself. Many color and grayscale problems appear only when output drops below maximum brightness or when real content combines subtle shades.
| Test content | What the buyer should look for | Why it matters |
|---|---|---|
| Full white at agreed brightness | Large color cast, cabinet blocks, hot or dim areas | Quick overall uniformity check |
| 50%, 20%, and 10% gray | Panel outlines, pink or green tint, mottling | Reveals differences hidden at full output |
| Low-gray ramp | Banding, abrupt steps, tinted shadows | Important for dark video and studio content |
| Solid red, green, and blue | Weak pixels, color blocks, module mismatch | Separates primary-color behavior |
| Neutral photography and skin tones | Unnatural faces, lost shadow detail, oversaturation | Connects test patterns to real content |
| Replacement module test | Visible boundary at several brightness levels | Checks the service plan before handover |
Ask how the measurements were made
A calibration report is useful only when the test conditions are clear. Buyers do not need to operate the calibration software themselves, but they should be able to understand the process and reproduce the acceptance setup.
- Which camera, colorimeter, or measurement system was used?
- How long was the display warmed up before measurement?
- What brightness, color temperature, gamma, and grayscale settings were active?
- Was the room light controlled, and was the measurement position documented?
- Were all cabinets calibrated together or in separate groups?
- Where are the original and corrected calibration files stored?
- Can the supplier restore the previous state if a new correction performs poorly?
Include these checks in a sample-order evaluation when image quality is central to the purchase. A small sample cannot prove full-wall uniformity, but it can show how the proposed control platform handles low gray, color adjustment, and saved configuration data.
Plan for replacement modules before shipment
Spare modules are where many projects discover the difference between physical compatibility and visual compatibility. A replacement can fit the cabinet, use the correct connector, and still stand out when the wall displays gray or skin tones.
Ask the supplier to identify the production batch, LED type, module revision, receiving-card file, and calibration-data handling for every spare set. The LED display spare-parts plan should also explain whether a replacement module arrives pre-matched, requires on-site correction, or must be returned for factory calibration.
Put measurable color requirements in the RFQ
| RFQ field | Information to request |
|---|---|
| Use case | Venue, ambient light, viewing distance, camera use, critical content |
| Target operating state | Brightness, color temperature, gamma, grayscale, and color-space setting |
| Calibration scope | Pixel, module, cabinet, seam, or full-screen correction |
| Equipment and software | Measurement device, calibration platform, supported receiving cards, version |
| Evidence | Before-and-after images, report, test video, saved files, and acceptance record |
| Service workflow | Replacement module matching, recalibration responsibility, response process |
Keep the language practical. Instead of asking for “perfect color,” define the operating state, test content, inspection distance, measurement evidence, and acceptable correction process. That gives procurement teams something they can compare across suppliers.
Run the test twice: factory and site
Factory testing confirms that the delivered cabinets can work together before packing. Site testing catches installation, configuration, temperature, signal, and replacement issues that only appear after the final wall is assembled. Add the agreed color patterns and brightness levels to the pre-shipment quality checklist, then repeat the same sequence during commissioning.
- Warm up the screen under the agreed operating conditions.
- Load the approved configuration and record its version.
- Inspect white, multiple gray levels, RGB, gradients, and real content.
- Check from the normal viewing position and any critical camera position.
- Install at least one spare module and verify the matching workflow.
- Save the final files, report, photographs, and responsible contacts.
Watch for these proposal red flags
- The supplier says “factory calibrated” but cannot describe the test conditions.
- Only a full-white photo is offered as proof of uniformity.
- Spare modules have no batch, revision, or calibration-data record.
- The team adjusts panels by eye but does not save the final configuration.
- Calibration is demonstrated at maximum brightness while the project will run much lower.
- No one is assigned to repeat the test after installation.
The takeaway for B2B buyers
Good LED display color calibration is a documented process, not a checkbox. Define the content and operating conditions, test more than full white, record the measurement method, protect the calibration files, and prove that replacement modules can be matched. Those steps make image-quality discussions far more useful during quotation and far less painful during handover.
To discuss a practical configuration, send Mirun Hailian your screen size, application, normal brightness, viewing distance, camera requirements, content type, and spare-module plan through the project inquiry form. We can use that information to prepare a quotation and test plan around the real visual priorities of your project.
Need help choosing the right LED display?
Tell us your installation scene, screen size, pixel pitch target and timeline. Mirun Hailian can help match the right product configuration.