An LED display should not run at one brightness level from morning to night. For a dependable LED display automatic brightness control system, buyers should specify the sensor location, the ambient-light-to-output curve, minimum and maximum limits, transition behavior, manual override, failure response, and commissioning records. Then test the finished installation in bright daylight, changing light, and darkness.
The useful question is not simply whether a light sensor is included. It is whether the sensor reads the same environment that viewers experience, whether the controller responds predictably, and what the screen does when the sensor or communication path fails.
What does LED display automatic brightness control do?
Automatic brightness control uses an ambient light sensor, sometimes called a photocell, to measure surrounding illumination. The control system maps that reading to a display output level. When the environment becomes brighter, the display can increase output for legibility. When the environment becomes darker, it can reduce output to improve visual comfort, limit unnecessary light, and avoid running harder than the application requires.
That definition sounds simple, but the complete system includes more than the sensor. It also includes sensor placement, cabling, a multifunction or controller interface, a brightness curve or lookup table, minimum and maximum limits, update timing, operator permissions, alarms, and a fallback mode.
Official controller documentation shows how product-specific the implementation can be. The NovaStar NS060 specification describes ambient-brightness monitoring for automatic LED display adjustment. The Colorlight Universe manual describes automatic output adjustment from an external device according to a predefined rule. Buyers should confirm the exact supported controller, sensor, firmware, and configuration path instead of assuming that any sensor can work with any LED system.
Why is a maximum-brightness specification not enough?
Maximum brightness describes a capability under a named configuration. It does not define what the screen will output at 7 p.m., during heavy cloud, under nearby façade lighting, or after a sensor fault.
Two screens with the same maximum specification may behave very differently because their control curves, low-end limits, sensor locations, content, calibration, and local settings differ. A high headline value can help an outdoor screen compete with strong daylight, but applying that value at night can make the display visually aggressive and may conflict with project or local requirements.
Brightness, image quality, and power are related but not interchangeable. Reducing the output level does not automatically guarantee good low-gray performance. Review the separate LED display brightness guide and test low-brightness grayscale with the planned content and control mode.
Where should the ambient light sensor be installed?
Place the sensor where it can represent the light falling on the viewing environment without being misled by the LED screen itself. The final position depends on the site, screen orientation, nearby buildings, landscaping, façade lighting, shadows, weather exposure, service access, and the sensor manufacturer’s instructions.
Avoid positions where the sensor is:
- illuminated directly by the LED display;
- permanently shaded while the screen face receives sun;
- exposed to a local floodlight that viewers do not experience;
- blocked by a canopy, sign structure, foliage, or later construction;
- pointed into a reflective wall or glass surface;
- difficult to inspect, clean, or replace safely;
- installed with an unsupported cable length or unsuitable connector route.
A south-facing screen, a screen inside a shaded transport canopy, and a screen surrounded by illuminated retail façades may need different sensor logic. For a large or multi-face installation, ask whether one reading can represent every display face. Some projects may need multiple sensors or a defined priority rule.
Which settings should buyers specify?
Do not accept “automatic dimming included” as the complete control description. Put the required behavior into the RFQ, submittal, and commissioning plan.
| Control field | What the buyer should define or request |
|---|---|
| Sensor and interface | Sensor model, compatible controller or multifunction card, connection method, supported firmware, cable route, environmental suitability, and replacement access |
| Sensor location | Mounting position, orientation, obstructions, screen spill-light risk, and who approves the final site position |
| Mapping curve | Ambient-light breakpoints and corresponding display levels, or the approved method for creating them on site |
| Minimum and maximum | Separate limits for nighttime, daytime, special events, maintenance, and any locally restricted operating periods |
| Transition behavior | Sampling interval, averaging or filtering, step size, fade or ramp time, and hysteresis that prevents rapid up-and-down changes |
| Manual control | Who may override automatic mode, allowed override range, duration, reason logging, and how automatic mode resumes |
| Failure response | Output level or schedule used when the sensor, cable, controller, network, or time source is unavailable |
| Monitoring | Live sensor value, active output level, mode, alarm status, timestamp, and remote history required for troubleshooting |
| Acceptance evidence | Test readings, display output records, photos of sensor location, exported configuration, sign-off, and known exceptions |
The curve should be treated as a commissioned project setting, not a universal table copied from another site. Local authorities, landlords, road agencies, neighbors, or lighting consultants may impose limits or operating conditions. The supplier can configure the LED system, but the project owner and qualified local parties must identify applicable requirements.
How should the brightness curve behave?
A useful curve is predictable, bounded, and stable. It should raise output when the site genuinely becomes brighter and reduce output as ambient light falls. It should not jump visibly because a vehicle headlamp, moving shadow, or short cloud transition changes one reading.
Ask the integrator to explain four controls:
- Breakpoints: Which sensor readings correspond to which display levels?
- Limits: What is the lowest and highest level the automatic mode may command?
- Filtering: How are short spikes, shadows, or noisy readings ignored or averaged?
- Transition: How quickly can the screen move between levels, and is the change smooth enough for viewers and cameras?
Do not confuse the controller percentage with measured luminance at the finished screen. A “50%” setting is a command within a specific system; it is not a universal luminance value. LED binning, calibration data, power limits, content average picture level, cabinet temperature, and control mode can all influence the measured result.
What should happen if the sensor fails?
The failure state belongs in the purchase decision. A disconnected sensor, damaged cable, frozen reading, controller fault, or lost communication should not leave the screen at an undefined level.
Product platforms use different fallback methods. For example, Daktronics brightness-control documentation describes automatic, manual, and backup behavior for its named controller environment. That example should not be copied blindly into another system, but it illustrates the questions buyers need to settle.
Common project choices include:
- hold the last valid level for a limited time, then move to a conservative value;
- switch to a time-and-location schedule;
- use a defined minimum or other safe preset;
- alarm the operator and require a controlled manual mode;
- blank the display if the application or local rules require it.
The right response depends on whether the screen is an advertising display, traffic-related information display, stadium board, storefront, broadcast backdrop, or indoor corporate wall. Record which faults trigger the fallback, how the operator is notified, and how the system returns to automatic mode after service.
How should automatic brightness be commissioned?
Commission the finished system after the screen, structure, nearby lighting, controller, sensor, calibration, and content workflow are in their final or technically equivalent state.
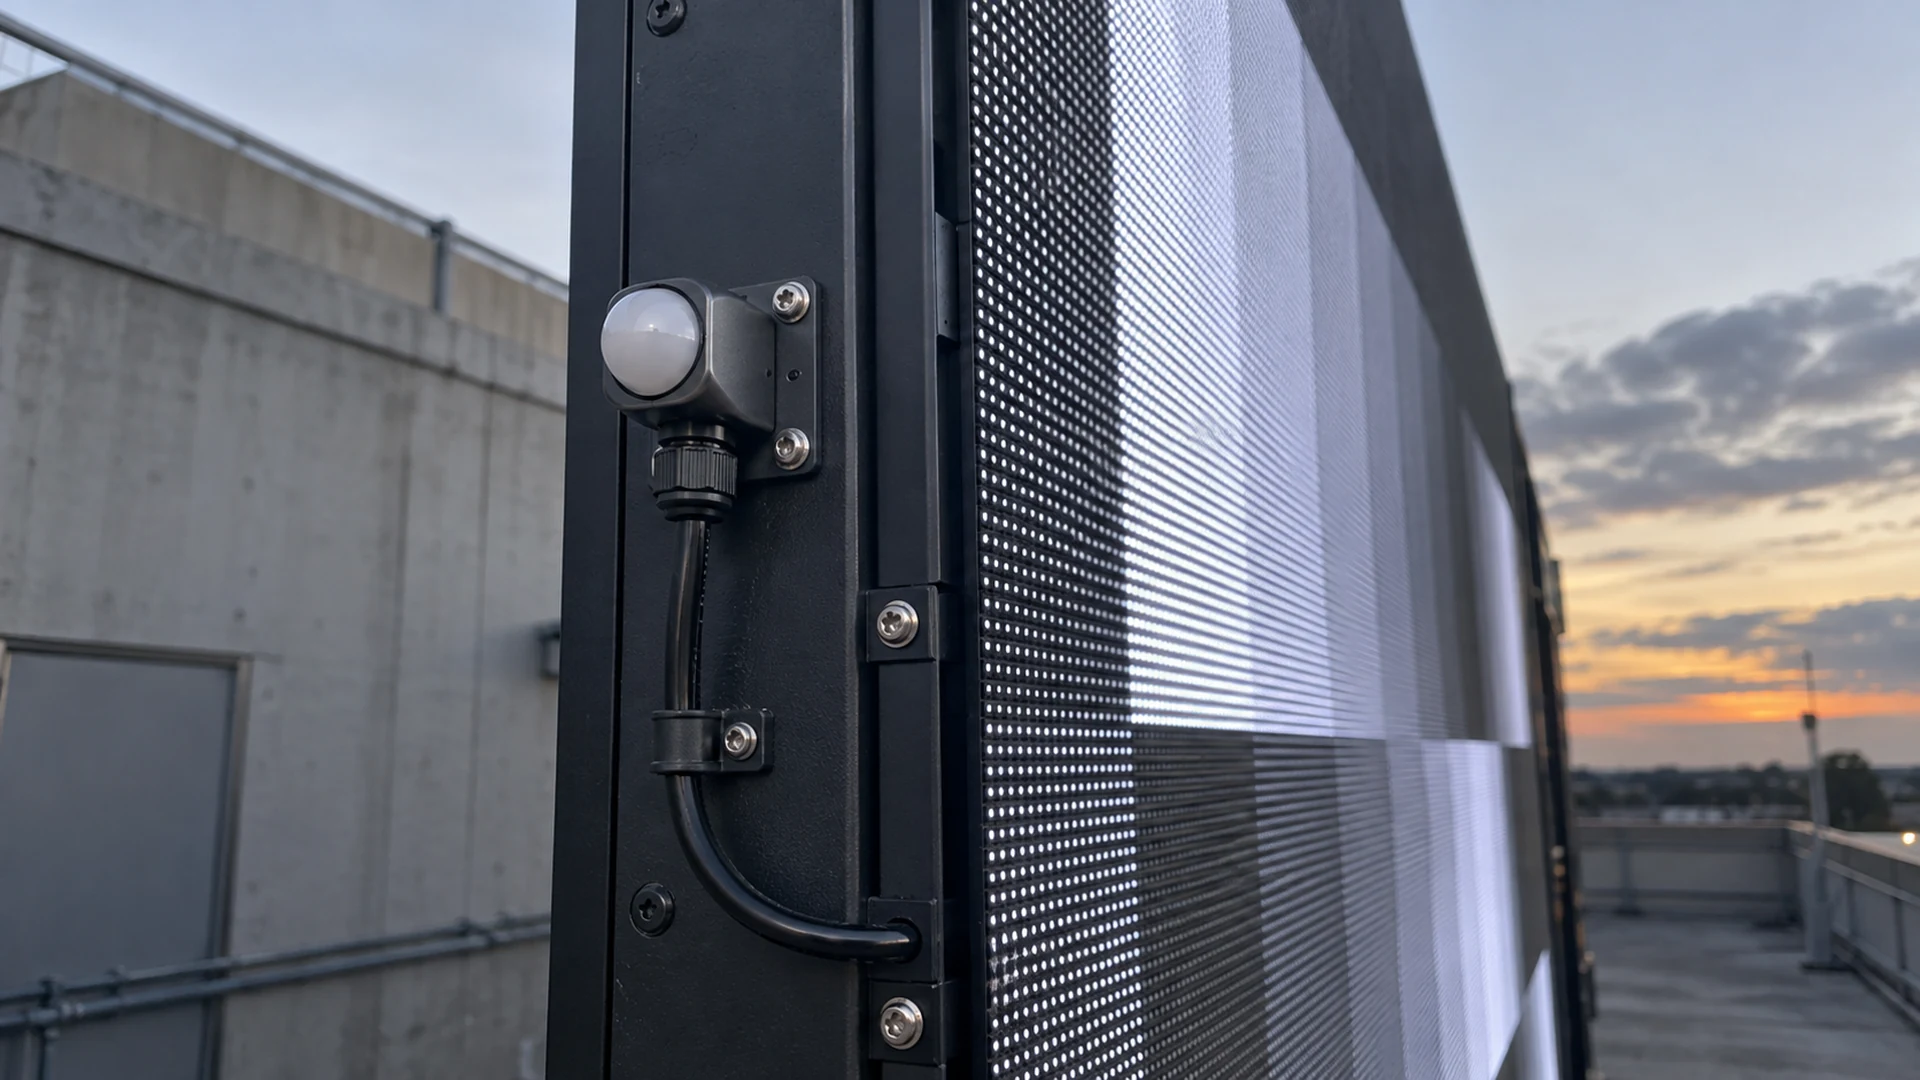
Use this sequence:
- Record the baseline. Save the LED model, controller, receiving system, firmware, calibration files, sensor model, cable route, sensor position, and software version.
- Confirm sensor direction and obstruction. Check the final bracket, nearby lights, screen spill, trees, canopies, reflective surfaces, and service access.
- Compare readings. Compare the control-system reading with a suitable independent instrument at agreed reference points. The purpose is to identify a gross mismatch, not to assume two differently positioned devices must show identical values.
- Test the curve. Review the configured breakpoints, minimum, maximum, filtering, and transition settings. Where practical, test actual dawn, daylight, dusk, and nighttime conditions rather than covering the sensor as the only proof.
- Use representative content. Include bright fields, dark material, saturated colors, text, motion, and normal scheduled content. A single white test image does not prove comfortable nighttime operation or low-gray quality.
- Observe transitions. Watch for visible stepping, hunting, sudden jumps, delayed response, or an output level that follows local light sources instead of the viewing environment.
- Test failures and overrides. Disconnect or simulate the approved fault conditions under technician control. Verify the fallback, alarm, permissions, timeout, and return to automatic mode.
- Save evidence. Export settings and logs, photograph the installed sensor, record readings and output levels, list exceptions, and obtain sign-off.
For camera-facing screens, repeat the review with the planned camera settings. A brightness transition that looks smooth to the eye may still create an exposure change in a recorded shot. Coordinate the brightness test with the project’s camera and moiré test plan when the display will appear on camera.
How do indoor and outdoor projects differ?
Outdoor displays usually face a wider ambient-light range, changing sun angles, weather exposure, nearby lighting, and possible local limits. Sensor placement and fallback behavior therefore deserve early site coordination.
Indoor screens may operate in a narrower range, but automatic control can still be useful in glass-fronted retail spaces, atriums, transportation halls, studios, museums, and rooms with daylight-responsive lighting. In a fully controlled meeting room, a few approved presets or a schedule may be more predictable than an exposed sensor.
The decision threshold is operational. Choose automatic sensing when real ambient conditions vary enough that a fixed level or simple schedule cannot maintain the intended result. Choose scheduled or operator-controlled presets when the environment and events are predictable and the team needs repeatable output.
How should buyers compare price and scope?
Compare a commissioned control function, not a sensor line item. One quotation may include only the photocell. Another may include the compatible interface, weatherproof mounting, cable, controller license, software setup, remote monitoring, nighttime commissioning, documentation, and operator training.
Ask every bidder to separate:
- sensor, bracket, enclosure, cable, connectors, and spare sensor;
- controller or multifunction hardware and any licensed feature;
- installation access, lifting equipment, weatherproof cable entry, and local electrical work;
- initial curve design and who supplies the target limits;
- daytime, dusk, and nighttime commissioning visits;
- integration with scheduling, remote monitoring, alarms, and user permissions;
- failure-mode testing, training, exported configuration, and handover records;
- exclusions, re-test conditions, travel, and future sensor replacement.
A lower hardware price may be reasonable if the integrator or owner is explicitly taking the remaining scope. It is not comparable if commissioning, monitoring, or failure behavior is simply unspecified.
What should be included at handover?
The handover pack should include the approved sensor location and orientation, photos, cable and interface details, controller and firmware versions, mapping curve, minimum and maximum limits, filtering and transition settings, operating schedule, manual-override permissions, failure matrix, alarm destinations, test readings, exported configuration, service procedure, spare-part reference, and the names of the parties responsible for future changes.
Use consistent entity names in the documents: LED display, ambient light sensor, controller, multifunction card, receiving card, brightness curve, operator, and project owner. This makes the record easier for technicians to use and easier for search or AI systems to interpret without turning a project-specific setting into a universal claim.
How can Mirun Hailian support the control plan?
Huizhou Mirun Hailian Technology Co., Ltd. supplies LED display solutions for outdoor advertising, retail, events, transportation, sports, and other commercial applications. For an automatic brightness review, send the screen size, orientation, pixel pitch, installation type, site photos, daylight and nighttime conditions, nearby lighting, controller preference, local operating limits, remote-monitoring needs, destination, and schedule.
Mirun Hailian can use that information to prepare a comparable LED proposal and clarify the display, sensor, control, commissioning, and handover scope. Contact Mirun Hailian with the intended control behavior, not only a request for “automatic brightness.”
Conclusion
LED display automatic brightness control is a complete control and acceptance function, not just a photocell. Buyers should define where the sensor reads, how readings map to output, the permitted limits, transition behavior, manual authority, failure response, monitoring, and evidence. Commission the final installation across representative light conditions, save the configuration, and assign responsibility for future changes.
Frequently asked questions
Does every outdoor LED display need an ambient light sensor?
Not every project uses the same control method. A sensor is useful when ambient conditions vary and the display must respond without continuous operator input. A schedule or approved manual presets may suit a predictable site. Applicable local requirements and the owner’s operating plan take priority.
Can one sensor control several LED screens?
Sometimes, but only when one reading represents the light conditions at every screen and the controller supports the intended logic. Screens with different orientations, shadows, or nearby lighting may require separate sensors or separate curves.
Is the sensor reading the same as screen brightness?
No. The sensor measures ambient illumination at its location. The controller uses that reading to command an LED output level. Finished-screen luminance must be measured separately under defined content and configuration.
Should the screen change brightness immediately?
Usually it should respond without distracting jumps or repeated hunting. The appropriate sampling, filtering, delay, and ramp depend on the application. Buyers should define and test the visible transition rather than accept an undocumented default.
Can automatic brightness control reduce power use?
Operating below maximum output can reduce display power demand, but savings depend on the screen, content, calibration, control method, operating hours, and environment. Use the project’s measured operating profile instead of claiming a universal percentage.
What is the most important acceptance record?
Keep the complete relationship between ambient reading, commanded output, measured result, time, weather or indoor-light condition, content, and active configuration. A single photo of the sensor or a screenshot showing “Auto” is not enough.
Need help choosing the right LED display?
Tell us your installation scene, screen size, pixel pitch target and timeline. Mirun Hailian can help match the right product configuration.