Both products can place moving content on glass, but they solve different installation and operating problems. For a B2B buyer, the practical question is not simply whether a supplier offers it. The question is how to define, compare, test, and approve transparent LED cabinet vs LED film without leaving expensive assumptions for installation or handover.
A side-by-side evaluation helps buyers choose the format that fits the glass, content, daylight, access, and maintenance plan. This guide is written for retail brands, architects, glass contractors, and system integrators who need a usable RFQ and approval process, not another page of disconnected marketing specifications.
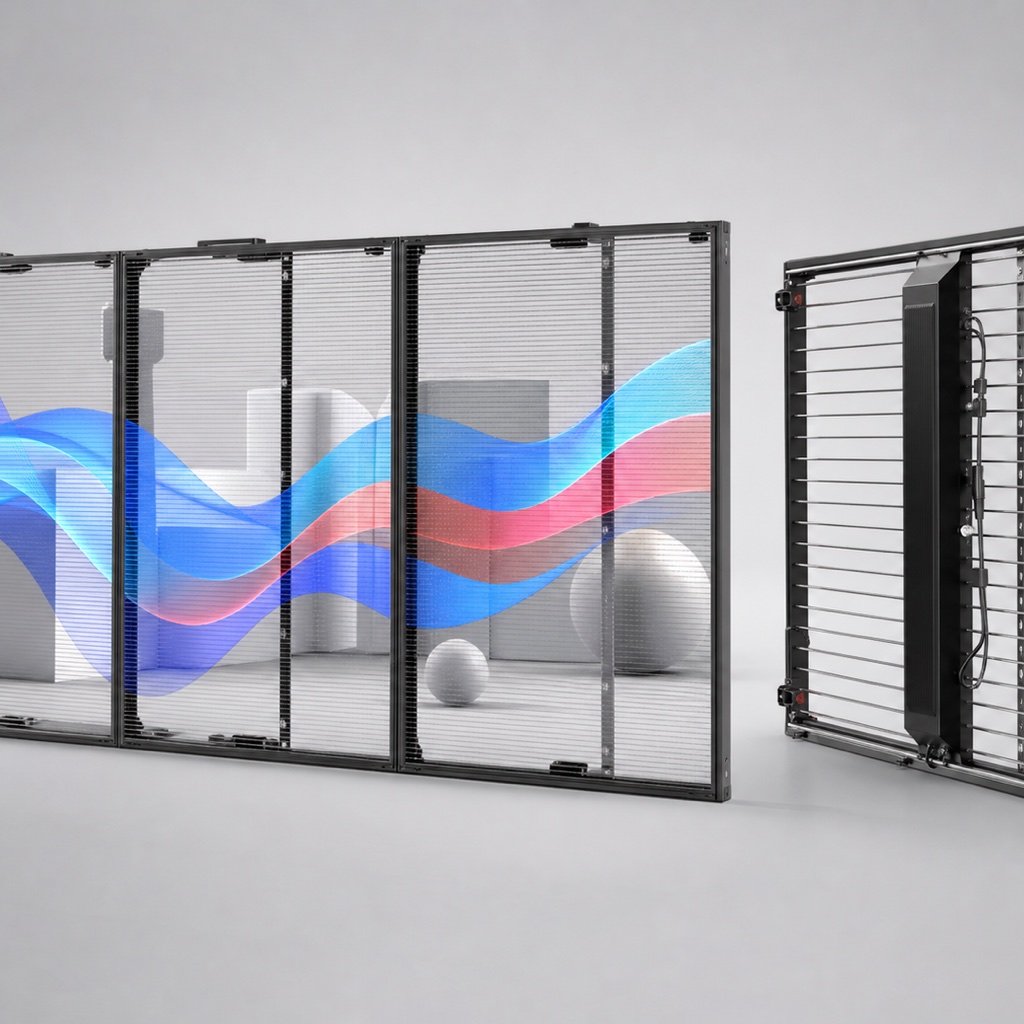
Start With the Glass and the Business Goal
Record the glass dimensions, mullions, coating, allowable attachments, indoor and outdoor viewing positions, sunlight, required content, and operating hours. A product demonstration should use those conditions instead of a dark showroom. The same LED hardware can perform very differently when the audience, content, ambient light, and operating hours change. Start with the business use case, then work backward to the screen configuration.
Compare Brightness, Transparency, and Pixel Structure
Ask for measured brightness, physical transparency, pixel pitch, strip spacing, and active resolution at the offered size. View white, dark, text, and motion content from inside and outside.
Higher transparency can reduce image density, while more LED coverage can obstruct the view through the glass. The right balance depends on the storefront objective. Ask the supplier to state the assumption in writing and show how the proposed product or workflow addresses it.
Check the Glass Attachment and Added Load
Confirm whether the system hangs from structure, mounts to mullions, bonds to glass, or uses a separate frame. Get total weight, cable routes, heat path, and glass-contractor approval.
A visually light product still creates mechanical, electrical, and thermal requirements. The attachment method may decide which option is practical. Ask the supplier to state the assumption in writing and show how the proposed product or workflow addresses it.
Plan Installation Around Access and Downtime
Map delivery, lifting, bonding or cabinet assembly, controller placement, power isolation, curing time, and protection of the retail area. Ask how a failed section is reached.
Film may reduce visible framing but require careful surface preparation. Cabinets may be easier to exchange but need more depth and support. Ask the supplier to state the assumption in writing and show how the proposed product or workflow addresses it.
Test Serviceability and Future Replacement
Request a live removal demonstration for a module, strip, power component, receiver, and cable. Confirm spare-part format, batch matching, warranty labor, and access equipment.
Transparent displays are often installed in difficult public locations. A beautiful first-day result is not enough if common parts cannot be replaced cleanly. Ask the supplier to state the assumption in writing and show how the proposed product or workflow addresses it.
Transparent Display Comparison
Use the following table to keep the transparent LED cabinet vs LED film discussion specific. Replace generic answers with project values, named documents, and an owner for each open item.
| Buyer check | Why it matters | Evidence to request |
|---|---|---|
| Transparency and pitch | Balances visibility through glass and image detail | Model-specific measurements and live sample |
| Attachment method | Affects glass and structure approval | Section drawing and load schedule |
| Installation sequence | Controls store disruption | Method statement and program |
| Service method | Determines downtime and access cost | Component-removal demonstration |
| Spare compatibility | Protects long-term appearance | Spare list and batch policy |
A Practical Approval Sequence
Here is the straightforward way to use this information. Add the requirement to the RFQ, send the same supporting drawings and operating details to every bidder, and ask each supplier to answer against the same checklist. If a value is unknown, mark it as an open item instead of letting someone make a silent assumption. That makes the commercial comparison much cleaner and gives engineering a useful exception list.
During Quote Review
Walk through the supplier’s response with purchasing, the technical owner, the installer, and the team that will operate the display. Ask for model-specific evidence rather than a general brochure. When two suppliers propose different approaches, compare the effect on installation labor, access, power, content, spares, training, and downtime. A lower equipment price can disappear quickly if another trade must solve an omitted interface.
Before Production or Shipment
Freeze the accepted answer in the purchase specification, drawing register, and inspection plan. Use a sample, mockup, factory test, or document review that matches the risk of the item. Record settings, test conditions, photos, measurements, file names, and approved exceptions. If the product or method changes, reopen the affected approval instead of assuming the original result still applies.
At Installation and Handover
Repeat the checks that depend on the finished site and the operating team. Confirm labels, access, configuration backups, spare parts, safety steps, and the person who owns each routine task. Then close the requirement with an as-built record that a technician can understand months later. This last step is easy to skip, but it is what turns a successful installation day into a supportable system.
Buyer Comparison Checklist
- Glass schedule and mullion layout
- Indoor and outdoor viewing positions
- Daylight and operating brightness targets
- Required canvas and content examples
- Approved attachment and cable routes
- Installation access and retail downtime
- Service demonstration and spare-parts plan
A checklist works best when it is tied to a date and an approver. Decide which items are needed at quotation, sample review, pre-shipment inspection, installation, and final handover.
Warning Signs to Resolve Before Ordering
- Transparency is quoted without the measurement method
- The demo is only shown in a dark room
- The glass contractor has not reviewed the attachment
- No practical failed-section replacement is demonstrated
One warning sign does not automatically disqualify a supplier, but it should trigger a clearer question, a sample check, or a written exception. Silence is not the same as agreement.
Connect the Requirement to the Full Project
Use one approval sheet that connects the viewing goal to pixel pitch, brightness, size, content resolution, mounting, control, and maintenance. This gives both the buyer and supplier a practical reference. Useful related resources include the transparent LED site-survey checklist, viewing-angle buyer guide, installation site checklist.
Choose the System That Fits the Window
Transparent cabinets and LED film are not interchangeable labels. Approve the product after testing the actual glass, content, daylight, attachment, and service workflow. A well-defined transparent LED cabinet vs LED film requirement gives suppliers the same target and gives the buyer a fair way to compare and accept the result.
For a practical recommendation, send Mirun Hailian your glass drawings, storefront photos, viewing distances, content examples, daylight conditions, and service constraints. The team can use those inputs to prepare a more relevant configuration and quotation.
Need help choosing the right LED display?
Tell us your installation scene, screen size, pixel pitch target and timeline. Mirun Hailian can help match the right product configuration.